Usage Information
The electrode patches are disposable. A minimum of three electrode patches is required for each test subject (four to try out each attachment combination).
- To ensure good adhesion, rub the area of skin to be used with a paper towel – preferably dampened with an alcohol rub e.g. industrial methylated spirits (IMS).
- Decide on the lead type arrangement to be used (see ‘positioning the electrode patches’ below).
- Remove an electrode patch from the liner and place gel side down onto the skin, with the tab on the electrode pointing downwards on the arm or upwards on the ankle.
- Press the electrode firmly in place to ensure full contact.
- Clip the appropriate crocodile clip connector onto the tab part of the patch.
- After the investigation is complete, remove the electrode patch slowly with a peel back action.
Notes:
- Once a pack of electrodes has been opened, they should be stored in a cool place, in a clean dry airtight container.
- The electrodes may dry out, so do not open the pouch until they are about to be used. See the pouch for the ‘use by date’. Once opened, fold the open end of the pouch over at least once and secure with a paper clip or similar.
Positioning the electrode patches
Note: The test subject can attach both the electrode patch and leads; there is no need for the intervention of a second person. If necessary, the electrodes and leads can be connected discreetly under the test subjects clothing.
There are four suggested positions for the electrode patches – the inside of the upper left arm, the inside of the upper right arm, the area behind the ankle on the left leg and the area behind the ankle on the right leg.
There are three electrode leads from the ECG Sensor each with a different colour crocodile clip connector. The crocodile clip for the positive lead is red, green for the negative lead, and black for the reference point (isoelectric line).
There are three different ways that the electrode leads can be connected to the electrode patches. Each arrangement of lead and electrode will record a different shape and intensity of waveform and is described as a ‘lead type’. For the majority of individuals, either the Lead I or Lead II layout will produce the ‘typical’ ECG trace.
|
Lead type |
Red (Positive) lead |
Green (Negative) lead |
Black (Reference) lead |
|
Lead I |
Left arm |
Right arm |
Right ankle |
|
Lead II |
Left ankle |
Right arm |
Right ankle |
|
Lead III |
Left ankle |
Left arm |
Left ankle |
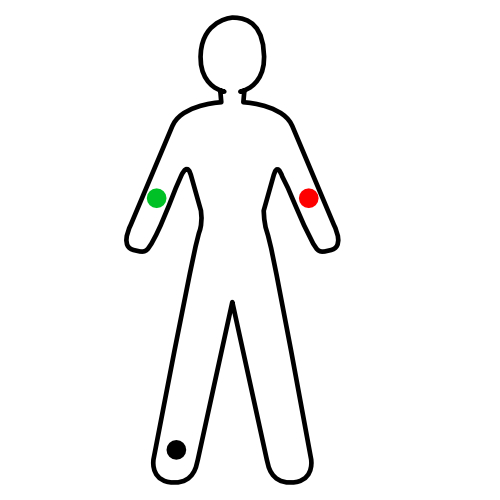
Lead I
- Rub the area of skin that will be used with the paper towel.
- Place an electrode patch on the inner part of your right upper arm, your left upper arm and on the area behind your right ankle.
- Connect the Green crocodile clip to the electrode tab on your right arm.
- Connect the Red crocodile clip to the electrode tab on your left upper arm.
- Connect the Black crocodile clip to electrode tab on your right ankle.
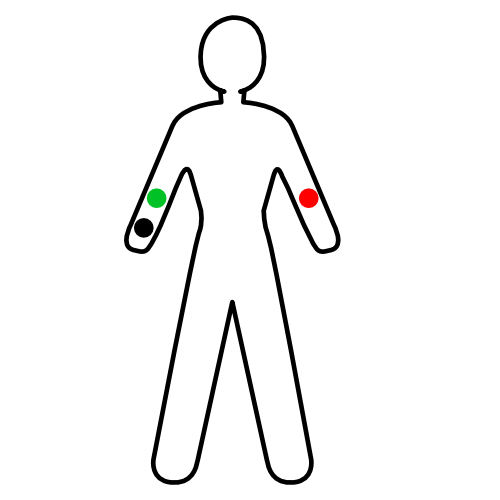
If attaching the lead to the ankle causes a problem, e.g. the test subject is wearing tights, use this alternative Lead I arrangement:
- Place an electrode patch on the inside of your right elbow, right wrist and left elbow.
- Connect the Green Crocodile clip to the electrode tab on your right elbow.
- Connect the Black Crocodile clip to the right wrist.
- Connect the Red crocodile clip to the left elbow.
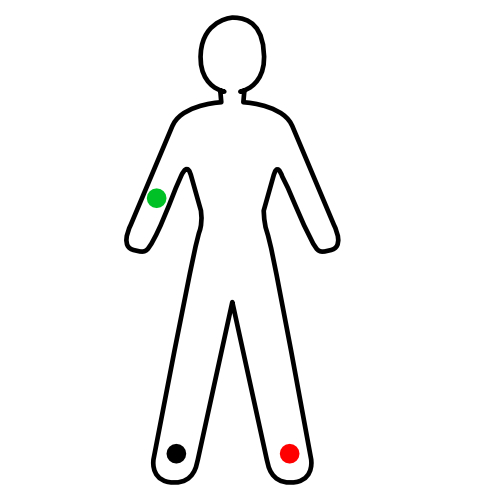
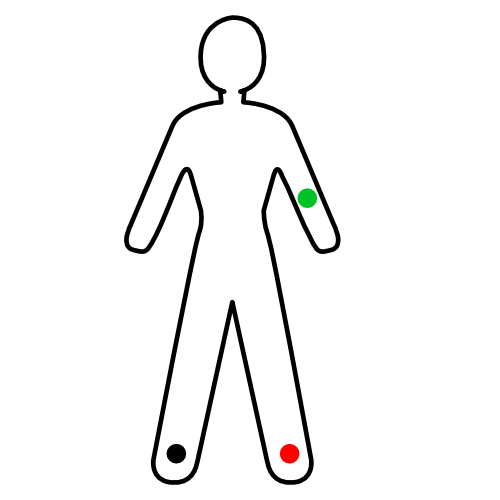
Lead II
- Rub the area of skin that will be used with the paper towel. Place an electrode patch on the inner part of your right upper arm, on the inner area behind your left ankle and on the inner area behind your right ankle.
- Connect the Green crocodile clip to the electrode tab on your right arm.
- Connect the Red crocodile clip to the electrode tab on your left ankle.
- Connect the Black crocodile clip to the electrode tab on your right ankle.
Lead III
- Rub the area of skin that will be used with the paper towel. Place an electrode patch on the inner part of your left upper arm, on the inner area behind your left ankle and on the inner area behind your right ankle.
- Connect the Green crocodile clip to the electrode tab on your left arm.
- Connect the Red crocodile clip to the electrode tab on your left ankle.
- Connect the Black crocodile clip to the electrode tab on your right ankle.
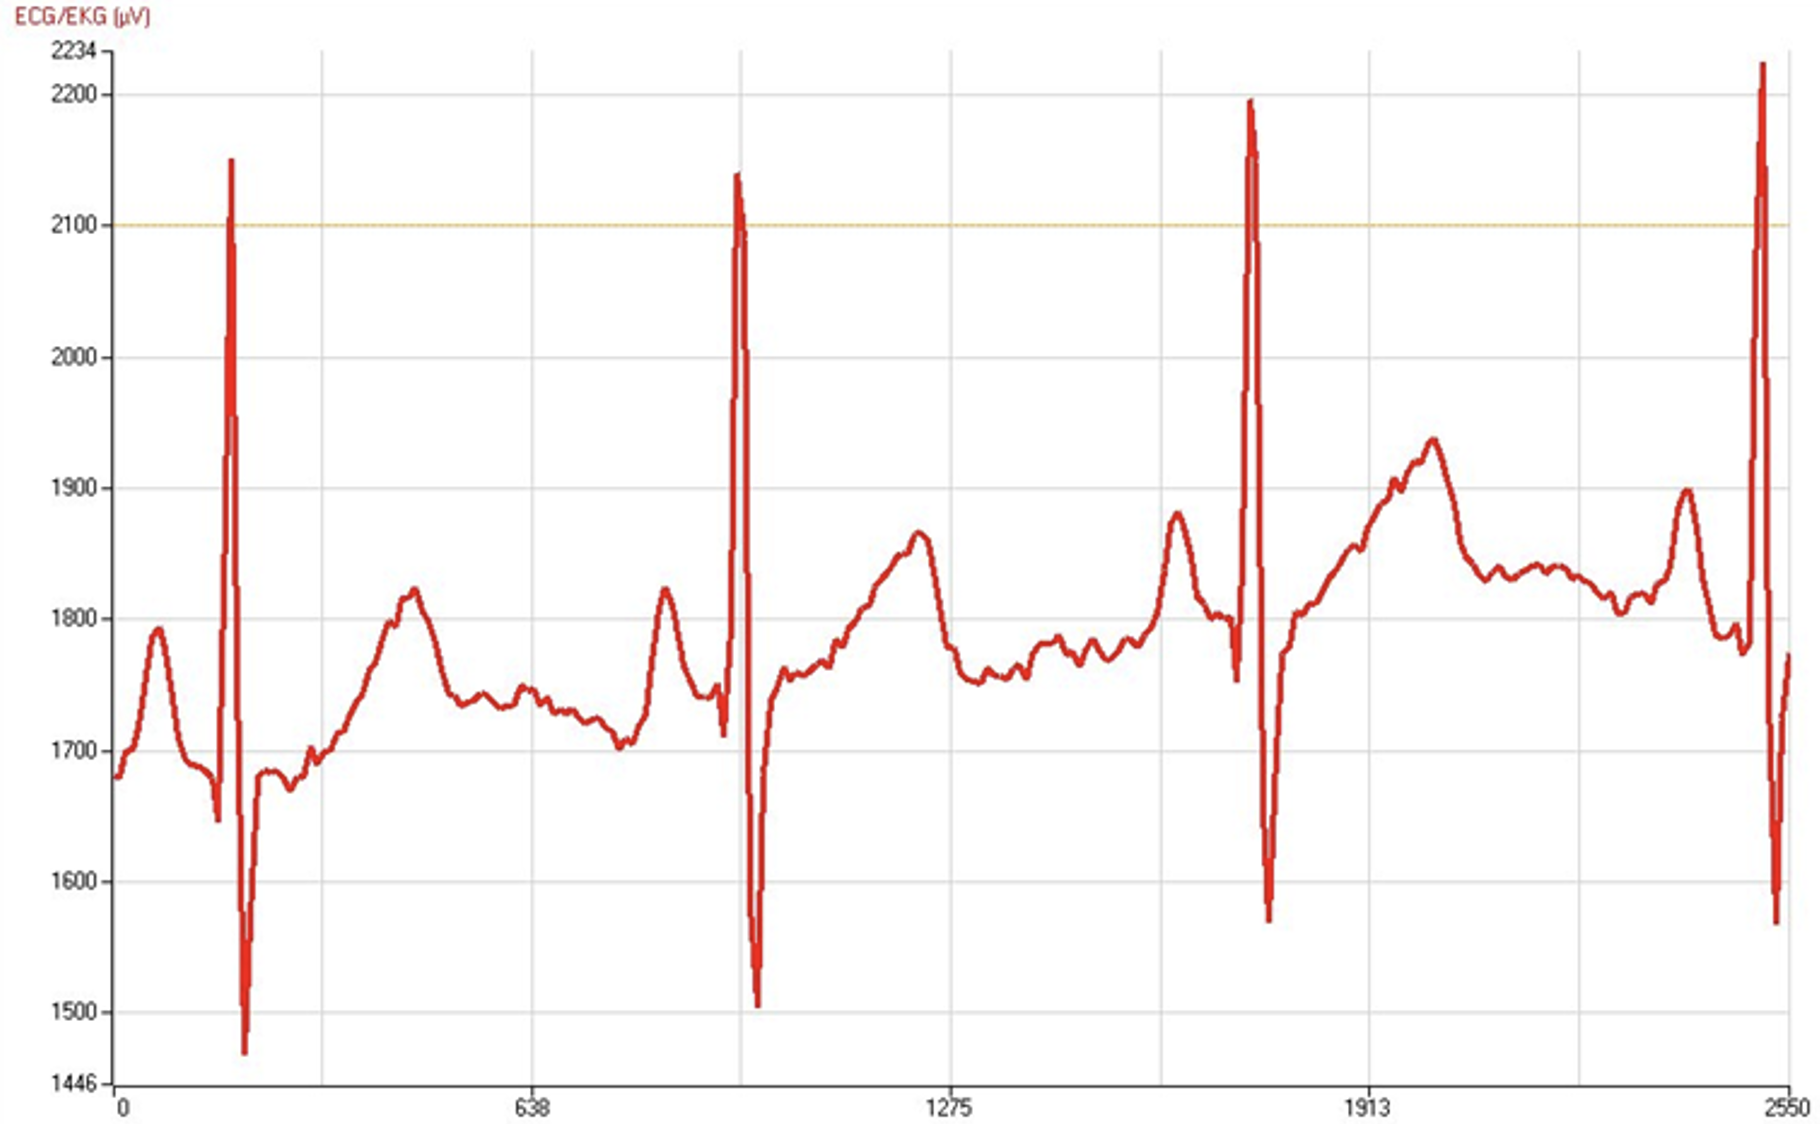
If the connections have been correctly made you should see a typical waveform pattern as shown. There will be slight differences between the lead positions and individuals.
For analysis work (periods between stages of ECG, for example) choose a combination of inter-sample period and recording duration that gives no more than four cycles per chart created.